Want to know how to make gluten-free Japanese milk bread?
Japanese milk bread recipes are all over the web recently. Hence, I decided to make a gluten-free version of the Japanese milk bread because I was drooling all over social media images of Japanese bread. This bread recipe is out of the ordinary. It's super moist and tastes terrific once toasted. Honestly, this is my favorite gluten-free bread recipe so far.
What is Tangzhong?
Japanese bread is soft and fluffy because it incorporates an Asian Technique called Tangzhong. Tangzhong is simply a mixture of flour and water; sometimes, milk is added instead of water. The flour and water are mixed at low heat to provide a slurry mixture. The mixture is then added to the main ingredients.
So why does Tangzhong provide soft and fluffy loaves of bread? When the flour and liquid are mixed at low heat, the flour's starches absorb the liquid, creating a slurry mixture. On the other hand, If you were to mix flour and water without heat, the flour won't retain all the liquid.
The absorbed liquid by the starches in the flour will provide moisture to the bread and rise in the oven. Furthermore, when baking gluten-free, I find that the Tangzhong technique gives the dough a more robust structure making it easier to handle. It also makes the dough less sticky.
For this recipe, I will be using water and milk to create the Tangzhong. You can use only water; however, I recommend using full-fat milk with water for better taste.
Japanese Bread Dough
The dough of the Japanese bread is similar to other bread doughs. However, what provides it with a milky taste is the use of milk and milk powder. Instead of using water to add moisture to the dough, we will only be using full-fat milk. Then to provide the dough with even more flavor, we will be using dry milk powder.
Meanwhile, for the flour, I used Schar Gluten-Free Mix B. It worked perfectly for the recipe. However, if you try other mixes, I'm sure the results will be somehow similar if you manage to maintain the ratios of the ingredients I used.
If the dough is too sticky then apply oil to your hands and equipment before handling it. This will make the dough easier to handle and shape.
How to create air bubbles in the bread?
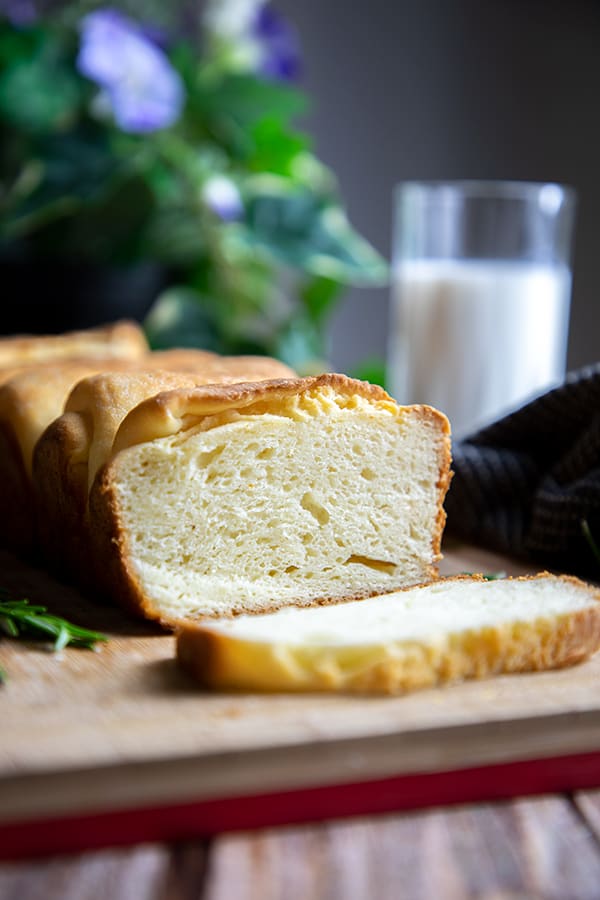
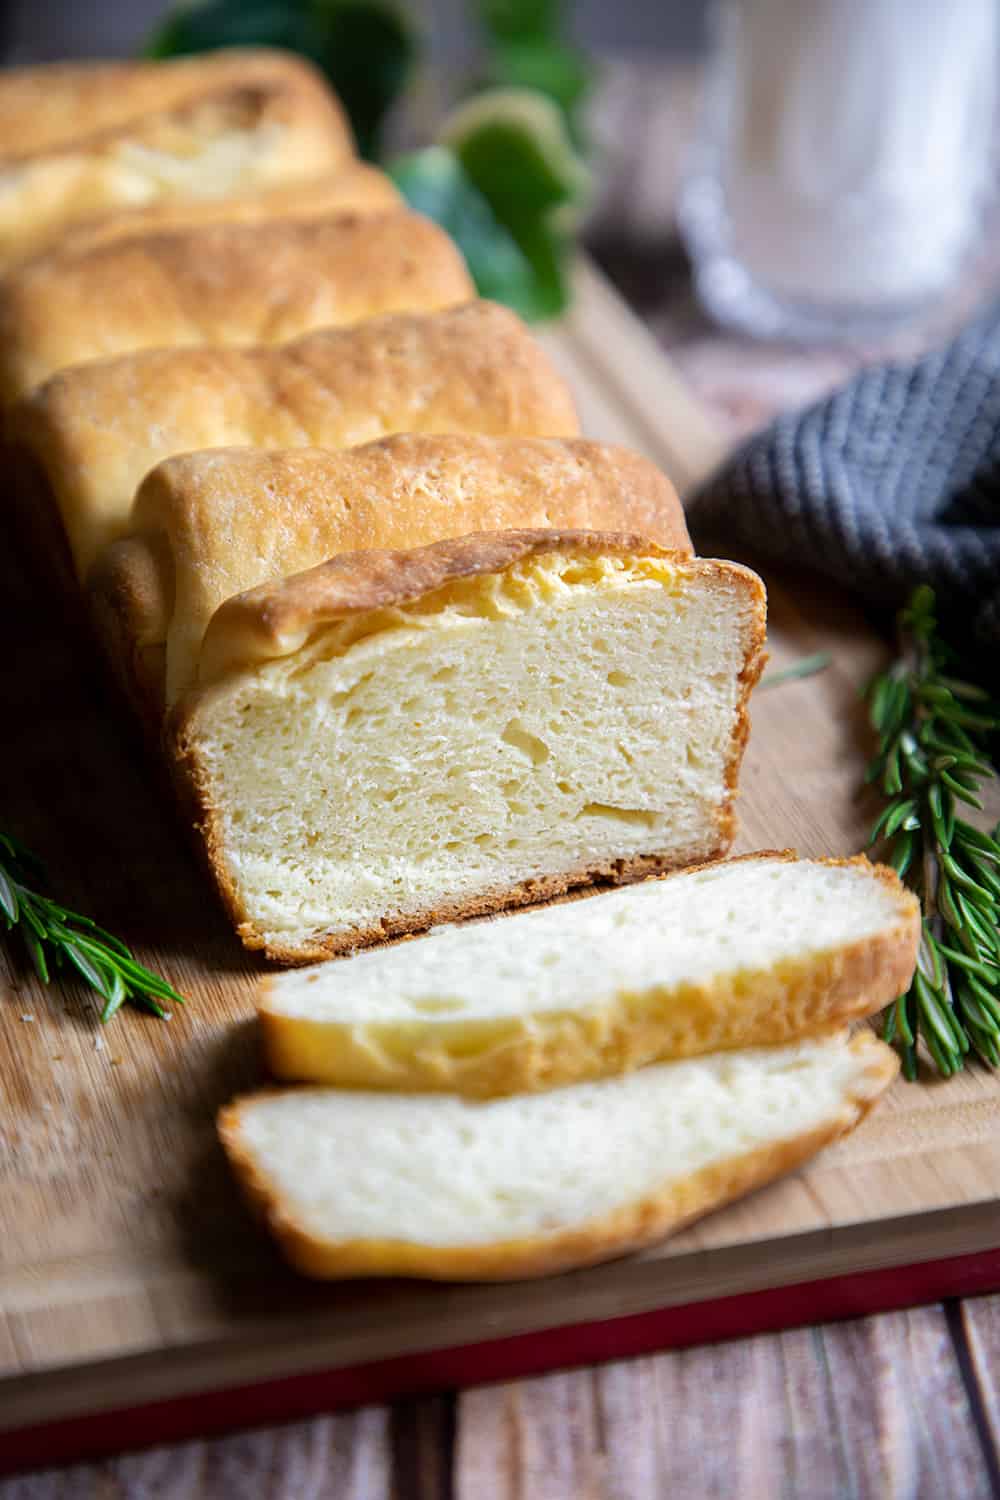
I'm very proud of the air bubbles I managed to create when making this recipe, as it resembled gluten-containing bread. The trick to making these air bubbles was to use apple cider vinegar, eggs, and baking powder. All these ingredients work to create a leavening effect helping your Japanese milk bread rise. Furthermore, when mixing the dough, I used a paddle attachment to trap as much air as possible. The trapped air then expands in the oven while the bread is baking, creating the tiny air bubbles that bread is famous for.
Gluten-Free Japanese Milk Bread
Ingredients
Tangzhong
- 25 grams of Gluten-Free Bread Mix Flour
- 60 ml of Full-Fat Milk
- 60 ml of Water
Bread Loaf
- 5 grams of Instant Active Yeast
- 220 ml of Full-Fat Milk at ( 49 - 55 °C)
- 40 grams of Granulated Sugar
- 300 grams of Gluten-Free Bread Mix Flour
- 15 grams of Dry Milk Powder
- 1 teaspoon of Salt
- 1 ½ teaspoon of Xanthan Gum
- ½ teaspoon of Baking Powder
- ½ teaspoon of Cornstarch
- 30 grams of Unsalted Butter at Room Temperature
- 1 Large Egg
- 1 teaspoon of Apple Cider Vinegar
Instructions
Tangzhong
- In a medium-sized saucepan, mix the flour, milk, and water together using a whisk. Make sure there are no lumps. Then place the saucepan on the stove at low heat and keep stirring using a wooden spatula.
- Once the mixture thickens and becomes slurry ( approx 5 minutes), remove the saucepan from heat and cover it. Let the Tangzhong cool to room temperature before using it.
Bread Loaf
- In a bowl, mix the yeast, milk, and sugar together. Let the yeast mixture sit for 7 to 10 minutes before using. You will see bubbles forming, indicating that the yeast is active.
- In a separate bowl, whisk together the flour, dry milk powder, salt, xanthan gum, baking powder, and cornstarch.
- In a stand-alone mixer with the paddle attachment, beat the eggs and apple cider vinegar together at medium to high speed. Once mixed, add in the Tangzhong and beat until well combined.
- Then add the yeast mixture to Tangzhong and eggs and beat until combined.
- Then slowly add in the dry ingredients at low-medium speed and beat until all the ingredients are well incorporated. You will notice that the dough is formed.
- Increase the stand-alone mixer's speed to medium-high and add in the butter one teaspoon at a time until no butter remains.
- Remove the dough from the stand-alone mixture and flatten the dough into a rectangle using a rolling pin. Then roll up the dough from the shorter side of the rectangle and seal the edges once done.
- Grease the bottom of the loaf pan with butter and place your rolled dough into the pan. Brush olive oil on top of your loaf.
- Cover the pan with a damp kitchen towel and allow the bread to rise in a warm place for at least 2 hours before baking.
- Once the dough has doubled in size, place the cooking rack at the oven's center and preheat the oven to 180 ° C.
- Bake the loaf for about 30 to 35 minutes or until a cooking thermometer reads 93° C when inserted in the middle of the loaf.
- Afterward, once the bread is done baking, shut off the heat and slightly open the oven's door. Allow your bread to cool to room temperature while it is in the oven with the door slightly open. This will prevent the bread from falling after it has risen.
Notes
- For this recipe, I used Schar Mix B Flour.
- If the dough is too sticky apply oil to your equipment and hands before shaping the dough.
Ann says
Tried this but my husband went shopping for me and I didn't notice until I was making it that he bought fat free milk! So I had cream on hand and nothing to lose at this point and substitute half the milk for cream. Turned out great! I can't wait to try again with the proper milk to see if there is a difference. I used better batter flour
Gigi says
Can I refrigerate the dough overnight and set it out to rise in the morning before baking as instructed? I’m sadly short on time most days and wanted to prepare in advance if possible. I can’t wait to try this! I adore Japanese milk bread, and am thrilled to have discovered your gorgeous gluten-free post here!!
Aya says
Hi Gigi, yes you can refrigerate the dough for up to 24 hours.
Martina says
Great recipe. Worked out very well. Thank you.
Addy says
Can I replace the cornstarch with a different starch? I have a friend who's allergic to corn and I want us all to be able to eat it.
Aya says
Yes, you can use potato starch instead.
Anonymous says
Thanks for the recipe, used King Arthur Gluten Free bread flour and it was super wet. No chance of rolling the batter (even between parchment paper) but dumped it all into the baking dish and it still rose.
Aya says
Oh that’s unfortunate! I’m glad it still rose and I hope it was still tasty.
Kim says
How long does this recipe take to rise. I have had it in the proof for 30 min absolutely not rising. Checked my yeast and it’s not old.
Aya says
It takes two hours to rise, as indicated in the recipe. Also, make sure to activate the yeast prior to adding it to the dough.
Graham says
Followed recipe to the exact instructions but my dough was very sticky and nearly impossible to roll up - please can you advise where I went wrong - thank you
Aya says
Hi Graham, the dough should be sticky but if its too sticky to roll it could be that the dough is highly hydrated. In that case, dust your working surface and rolling pin with gluten free flour to make it easier to roll. You can even try rolling it between two pieces of parchment paper.
Kathy says
Could you write out the ingredients using ounces instead of ml?
Anonymous says
Google can do this for you. Most digital scales can be changed to metric as well.
Arlyn says
I'm assuming that I can hold off on adding the xanthum gum if my GF flour already has it in the mix? I'm going to be using Better Batter GF flour. Thanks!
Aya says
Yes, you can omit the xanthan gum in this case 😊.
Kim says
Hi, For those of us with dairy sensitivities, could you recommend dairy substitutions? Almond milk ok? Dry milk powder options? Thanks!
Aya says
Hi Kim, you can substitute the milk with almond milk. The dry milk powder can be substituted with coconut milk powder. However, please note that the texture of the final product might differ.
KIM BOYER says
Thanks, we look forward to trying it!
Kayla DiMaggio says
Yum! I love milk bread and this was a bonus of being gluten-free! It was so delicious and fresh!
Jc says
Easy to follow. My dough was also too wet to roll so it didn't really double in size in the proofing stage. However, it still turned out well, may be not as airy as your photo. I'll keep this recipe and try it again next time.
Jerika says
Wow! I can't wait to try this gluten-free Japanese milk bread. And it's a gluten-free version.:) Love it!
Andréa Janssen says
What a delicious recipe to bake next weekend!
Jan says
Hi can I make this recipe into buns rather than a loaf? I want to try and replicate pineapple buns from HK and want to use this as the recipe. Thanks
Aya says
Hi Jan, yes, you can shape it into buns. However, the baking time might differ, so I recommend the use of a thermometer.
Anonymous says
Omg same!!!! That’s why I’m here 😂. I can’t wait to try this recipe 🙂
Jay says
Can I make this recipe into buns? I’m trying to replicate HK pineapple buns and thinking to use this bread as a base. Thanks
Aya says
Hi Jay, yes, you can shape it into buns. However, the cooking time might differ. So I highly recommend the use of a thermometer to know if the buns are baked. When the temperature at the center of the bun reaches 92-93°C, you are good to go. Let me know how your pineapple buns turn out; I'm intrigued.:D
Lilian says
This is the best Japanese milk bread I've done so far! I am so glad I came across your blog. I made it yesterday and is still soft and pliable without the need to toast.
It rose perfectly, the texture is beautiful with all the air bubbles. You would not say it is wheat free!
I used Caputo Fioreglut flour.
Thank you for sharing this! I will definitely make it again.
Aya says
Hi Lilian, I'm so glad you liked it!
Thank you so much for taking the time to write a review. I appreciate it! Your comment made me very happy! 😀