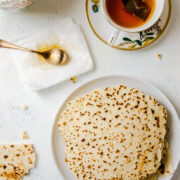
Easy and versatile gluten-free flatbread recipe that is perfect for dipping, sandwich wraps, and even a falafel sandwich.
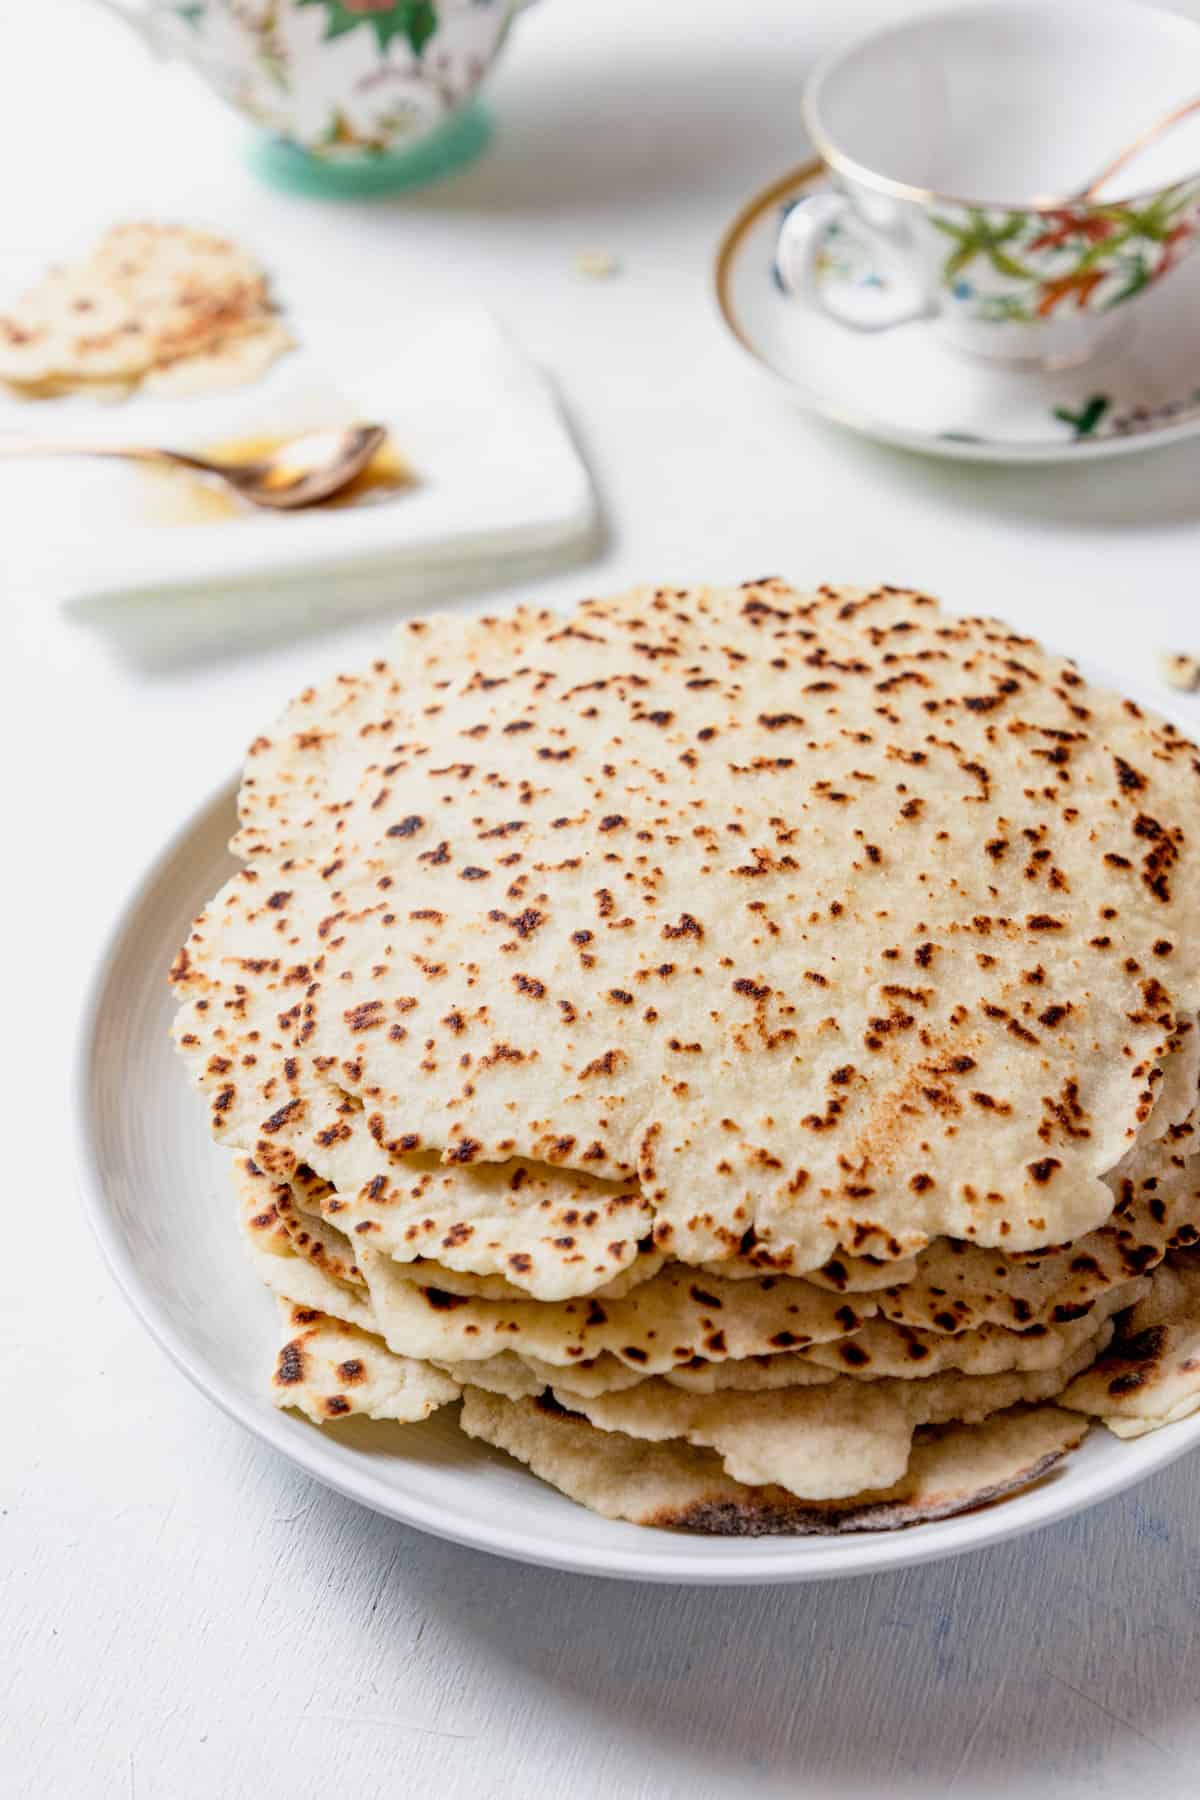
Flatbreads are convenient, especially for work. It is even great as sandwich wraps to take to school for lunch. I make this recipe every week because store-bought gluten-free bread is too expensive. This gluten-free flatbread recipe will show you how to make a thin, delicious flatbread. If you are in the mood for a flatbread pizza instead you might want to give the Lebanese flatbread pizza a try.
Gluten-Free Flours to make Flatbread
I have tried this recipe so many times but was never truly satisfied with the outcome until I changed the flours I have been using. The key to a delicious gluten-free flatbread is to make sure that the flours being used have a high protein content and a nutty flavor. Otherwise, the flatbread will turn out to be gritty and bland.
Therefore this flatbread recipe calls for the following gluten-free flours:
- White Rice Flour
- Tapioca Flour
- Almond Flour
- Millet Flour
Almont flour and millet are great flours in this recipe. They are high in protein and provide the flatbread with a delicious nutty flavor that makes it suitable to eat without any add-ons. Trust me, you won’t be able to resist eating the bread while baking it.
Other Essential Ingredients
Other than gluten-free flours, here is what you will need!
- Salt: to flavor the flatbread
- Xanthan gum: Acts like gluten and helps the ingredients bind together.
- Baking Powder: I know what you are thinking. Why do you need baking powder in a flatbread recipe? The role of baking powder here is not to make the bread rise but to make it soft, fluffy, and bendable. This gluten-free flatbread will not break if you bend it. That I promise you.
- Instant-active yeast: I love the use of instant active yeast because it is easy and not intimidating. Also, it works 98% of the time.
- Full-Fat Milk & Water: Full-fat milk and water will both prevent the dough from being dry. Meanwhile, the full-fat milk will provide the flatbread with some fat content and flavor. Make sure that both the milk and water are at 49-55°C.
- Granulated Sugar: Sugar is needed for the yeast. The yeast will not react and do its job without sugar.
- Olive Oil: the primary fat source for this recipe. Instead of butter, I highly recommend using olive oil as it is healthier and provides the flatbread with a nice olive flavor.
Preparing the Flatbread Dough
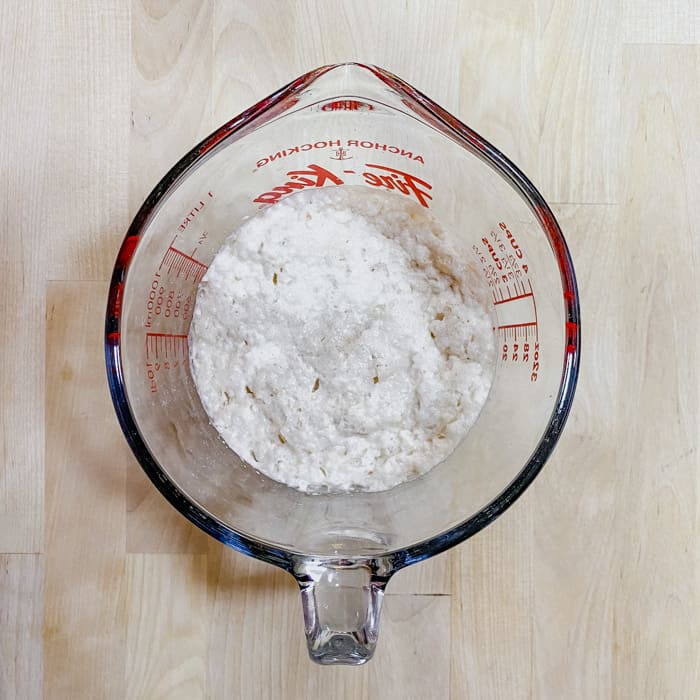
First, in a bowl, add the warm milk, warm water, and instant yeast. Gently stir the mixture and cover it. Set the yeast mixture aside for 10 minutes. After, 10 minutes you should be able to see some bubbles that indicate that the yeast is active.
Meanwhile, in the bowl of a stand-alone mixer, sift the white rice flour. Tapioca flour, almond flour, and millet flour. Then add the xanthan gum, baking powder, salt and combine everything together using a whisk. Afterward, attach the paddle attachment to your stand-alone mixer and add the olive oil and yeast mixture to the dry ingredient. With the paddle attachment attached, beat the ingredients together at medium-high speed for about 5 - 7 minutes.
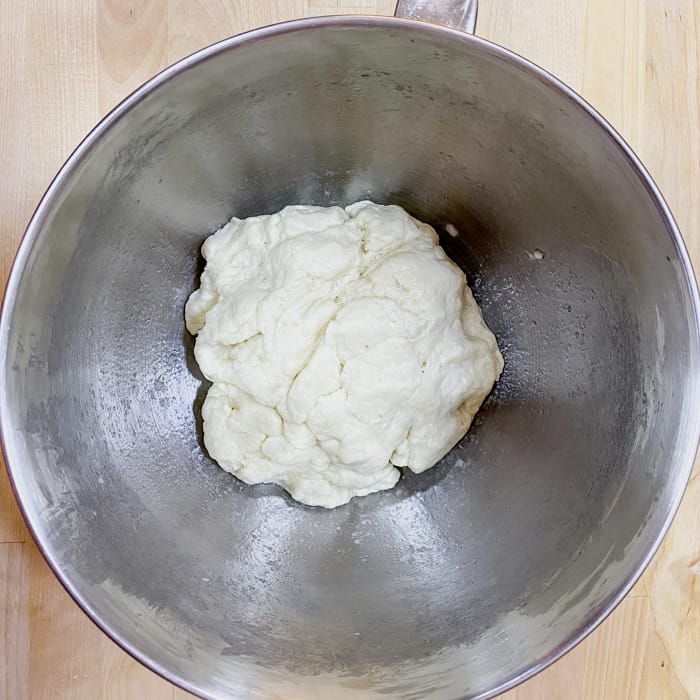
Grease the bottom and sides of a glass bowl and transfer the dough to it. Cover the dough with plastic wrap and a damp kitchen towel. Furthermore, allow the dough to rest and rise for 1-2 hours.
After the dough has risen, divide it into 8 equal dough balls. For me, each dough ball had a weight of 60 grams.
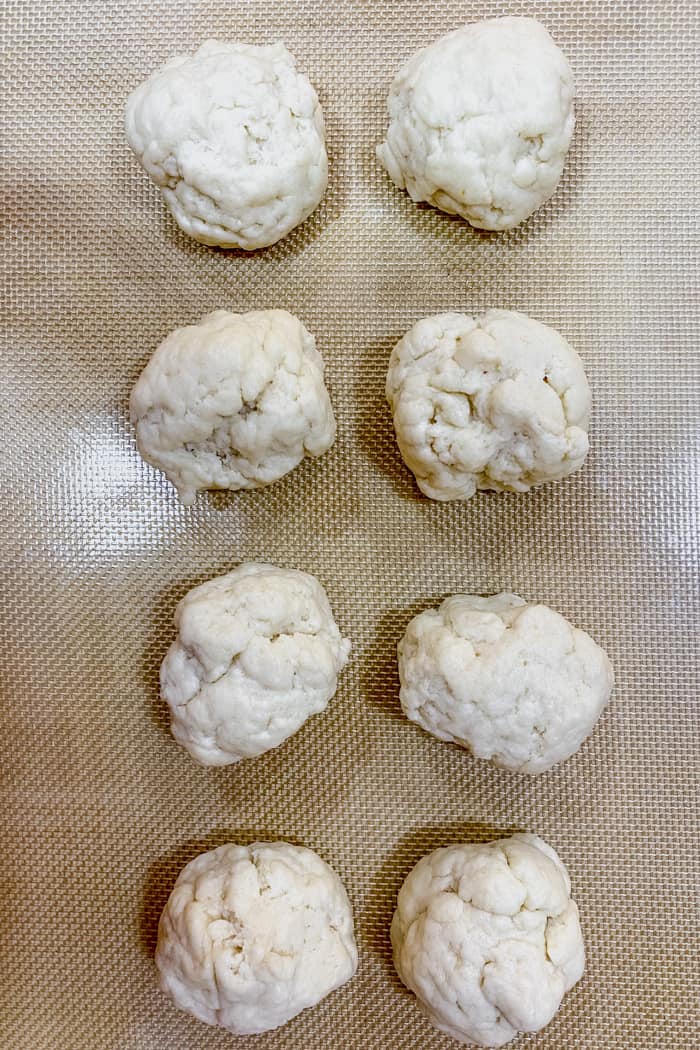
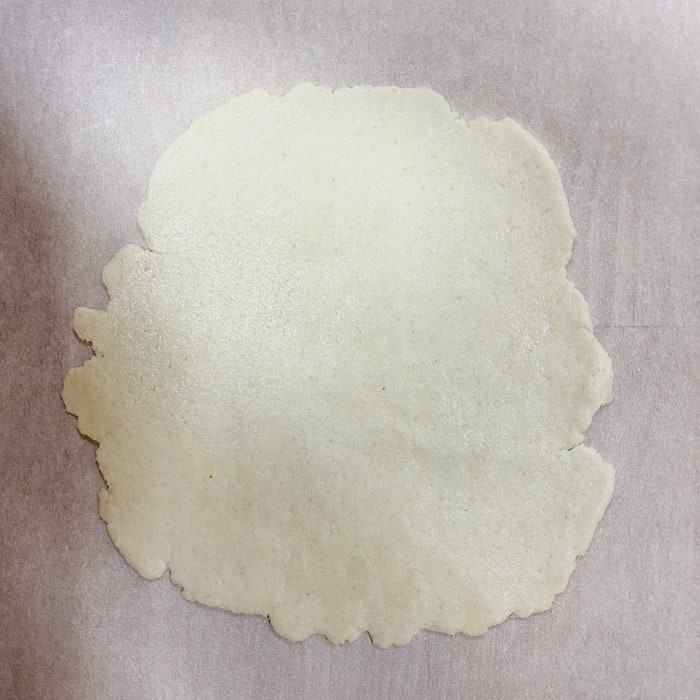
Next, dust your working surface with any gluten-free flour available and flatten each dough ball into a flat circle, as seen below. The thickness of each flatbread should be about 2-3 mm, and the diameter is around 22-23 cm ( 9-inch).
Baking the Flatbread
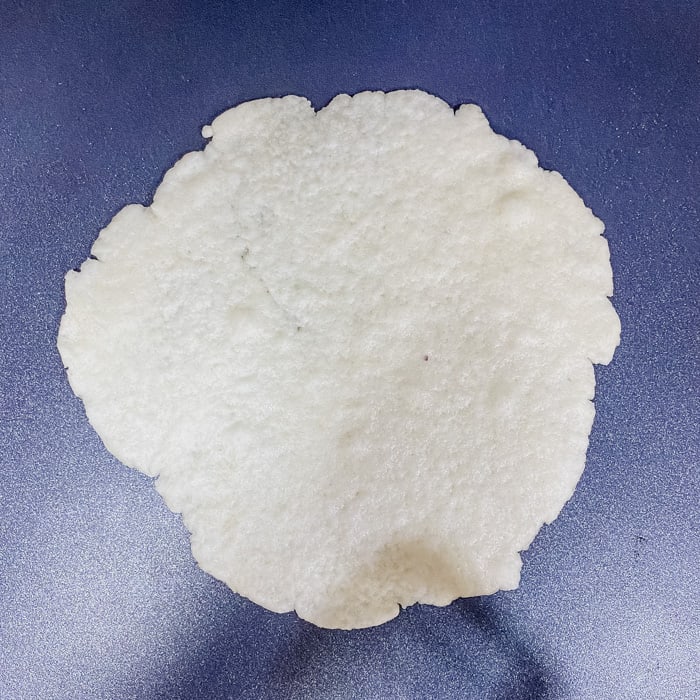
Pre-heat a non-stick skillet on the stove at medium-high heat for about 10 minutes. Then reduce the heat to low-medium and add one flatbread.
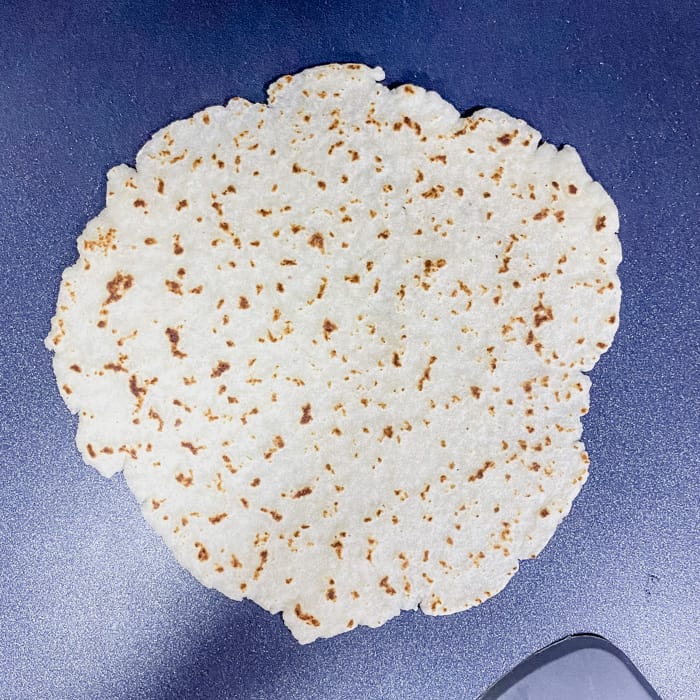
After 10 seconds, once tiny bubbles have formed, flip the flatbread to the other side and bake for another 10 seconds.
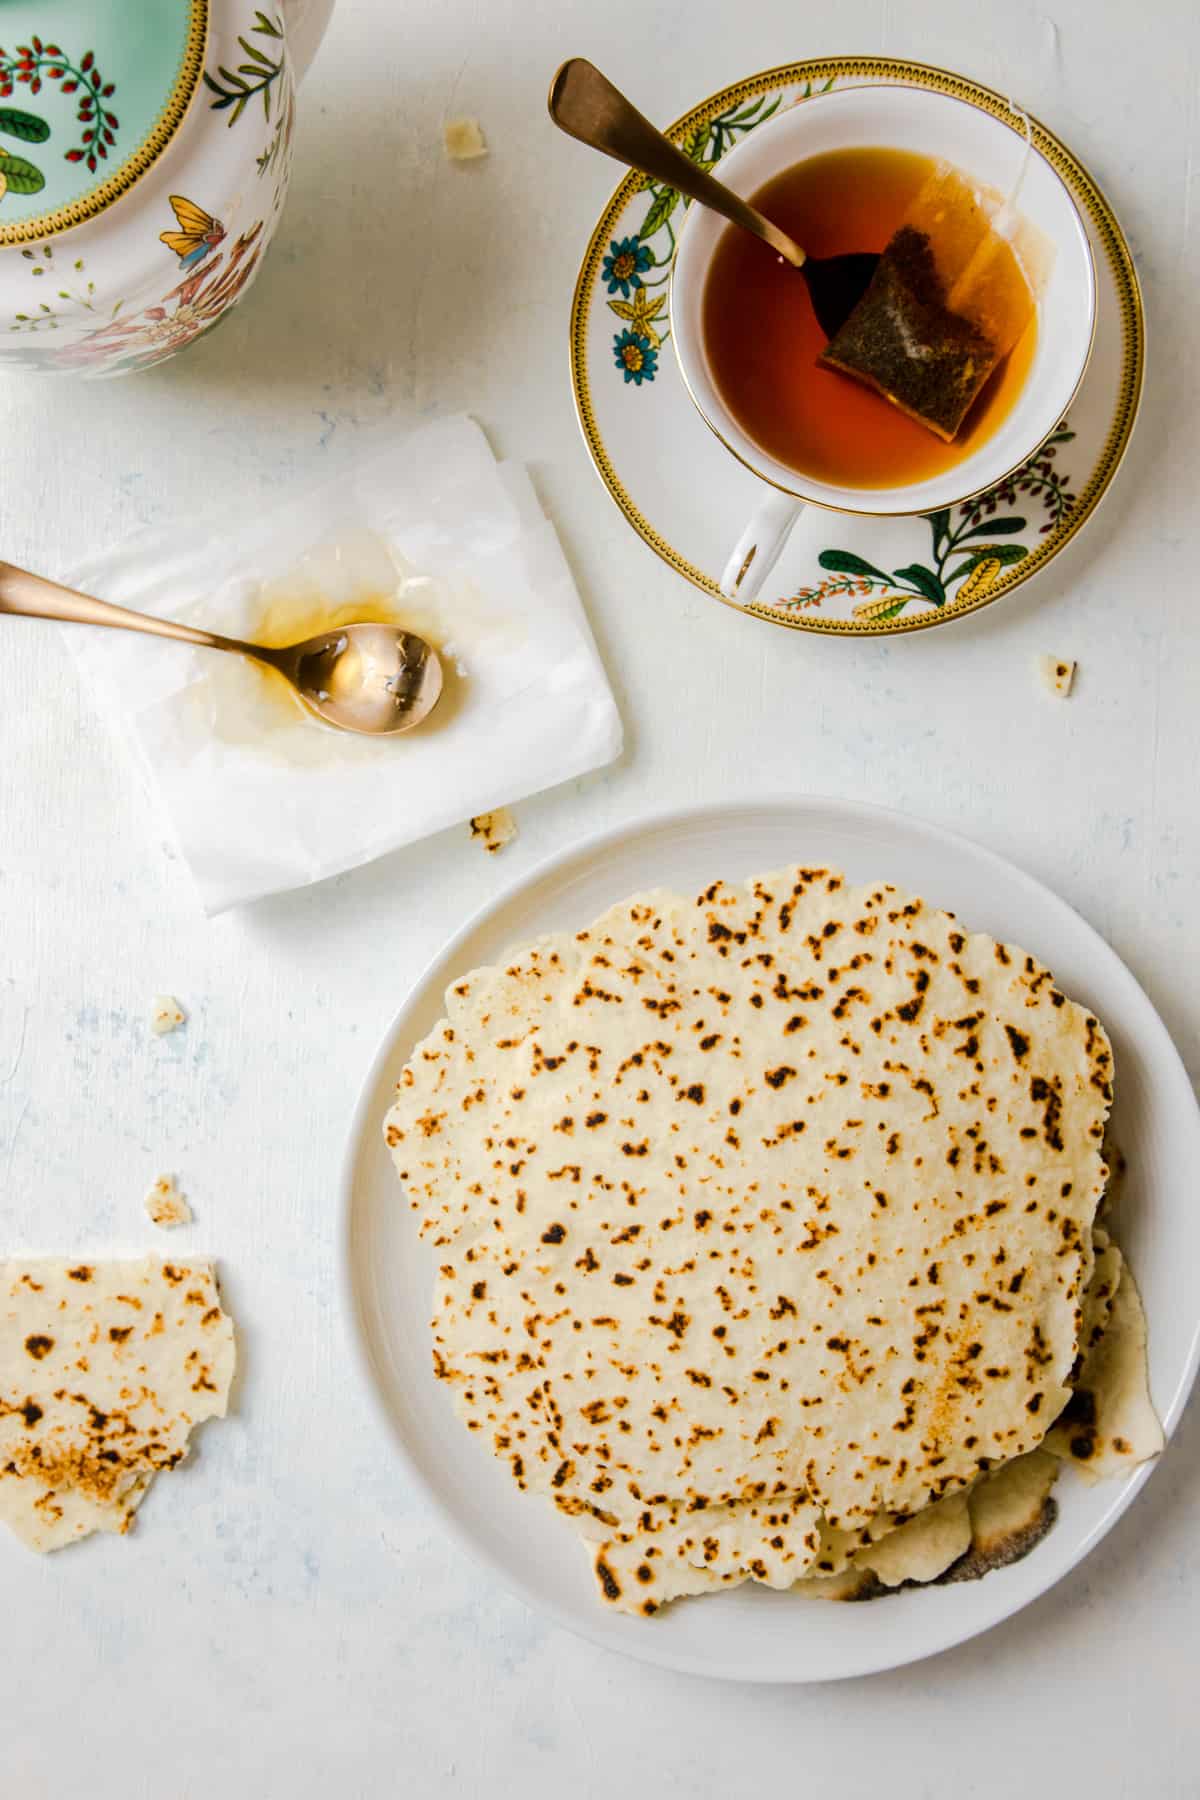
Wrap the finished flatbreads with a kitchen towel to keep them moist, soft, and pliable.
Storing gluten-free flatbread
If you don’t feel like using all the dough, you can store the dough in the fridge for up to three days in an air-tight container. However, bring it to room temperature before baking.
The baked flatbread can be stored in the fridge for up to a week in an air-tight container. Before use, it is best to heat it up in the oven, on a skillet, or in the microwave. This flatbread recipe is very versatile and won’t let you down.
Easy, Everyday Gluten-Free Flatbread Recipe
Ingredients
- 5 grams of Instant Active Yeast
- 100 ml of Water
- 100 ml of Full Fat Milk
- 33 grams of Granulated White Sugar
- 135 grams of White Rice Flour
- 54 grams of Tapioca Flour
- 54 grams of Almond Flour
- 27 grams of Millet Flour
- 1 ½ teaspoon of Salt
- 1 teaspoon of Baking Powder
- 2 teaspoon of Xanthan Gum
- 1 tablespoon of Olive Oil
Instructions
- In a bowl, mix the yeast, sugar, milk, and water together. Cover the mixture tightly using a plastic wrap or a kitchen towel, and let it sit at room temperature for 10 minutes. The yeast should activate and form bubbles.
- In the bowl of a stand-alone mixer, sift the flours, salt, baking powder, and xanthan gum. Using a hand-held whisk, whisk the dry ingredients to combine.
- Next, add the olive oil and yeast mixer to the dry ingredients. At medium-low speed, blend the ingredients with the paddle attachment attached for about 3-5 minutes.
- Transfer the dough to a greased bowl and cover it with plastic wrap and a damp kitchen towel. Allow the dough to rise for two hours at room temperature.
- Once the dough has risen, pre-heat a medium-sized skillet on the stove at high heat.
- Then divide the dough into eight equal parts.
- Dust the working surface with gluten-free flour to begin shaping the dough. Flatten each dough into a 20-23 cm circle in diameter with a 3 - 4 mm thickness, using a rolling pin. If the dough is too sticky, dust a small amount of gluten-free flour on it.
- Lower the heat under the skillet to medium-low. Working with one shaped dough, gently transfer the dough to the skillet using a spatula. After 10-12 seconds, or once tiny bubbles have formed on the dough, flip the dough using a spatula for cooking the other side. Let the other side cook for another 10 seconds. Next, transfer the flatbread to a clean kitchen towel and cover it with the towel.
- Keep repeating step 8 until you are out of dough.
Notes
- The flatbread dough can be stored in the fridge for up to three days. Before use, allow the dough to reach room temperature.
- The flatbread can be stored in the fridge in an air-tight container for up to a week.
- Cooked flatbread can be stored in the freezer for up to three months. Defrost the flatbread before use in the fridge.
- Wrapping the flatbread with a kitchen towel right after cooking allows it to pertain its moisture and makes it pliable.
Kate says
HI ,I made this and have to say I admire the detailed intgredient list, Sadly my dough didnt really rise ,so it was a bit hard the bread,
next time I think i cook it faster make it higher I did make it only 3 mm, I do love the taste i have to say its lovely,thanks